Tips and Video - Installing Glue Down Vinyl Flooring

Should you buy a "loose lay" vinyl floor?
A loose lay vinyl floor is one which is not glued down to the subfloor under it. This includes our vinyl plank flooring, which has a floating floor, click together type of installation. These appeal because of their simplicity and cost, especially if you want to install the floor yourself, but they are not for all situations. We do not recommend that you install vinyl flooring that you do not glue down into a room which will have heavy rolling traffic, like the wheels of an office chair (with a person in it), or portable carts. We also think you should get an adhered floor if you're covering more than 25 square yards, and when, with large sheet or rolled vinyl, more than once piece will be necessary, giving you seams. We just published a post of tips on installing floating vinyl plank flooring. In case that is not an option for you, we also wanted to share advice for those working with a glue down vinyl floor, whether large sheet vinyl, tiles or planks. The instructions that come with your flooring will be essential, but some of these tips might save you some time and frustration.
Installation tips - setting up
When you measure your room for sheet vinyl, add an inch or so to the measurement to ensure that really do you get from one wall to the other, and so that you can trim exactly along the wall to fit the floor in perfectly.
If your sheet flooring installation will have seams, plan the arrangement of the pieces so that you'll have as few of those as possible.Keep seams away from doorways, especially if they would have to be perpendicular to them. Also keep them parallel to traffic flow lines. Don't have your seams cross a common pathway.
For glue down floors, use the recommended adhesive, usually one manufactured by the maker of the flooring. Wear gloves if you will be applying this yourself.
No matter the style of vinyl you put down, if you install the floor yourself, you'll be crawling around on your hands and knees, either laying pieces or smoothing the vinyl down to the glue. We recommend kneepads. Seriously, they're the gel insole of the installation procedure.
Installation tips - starting off
When you install tiles, you will start in the middle of the room, snapping a chalk cord to make a couple of chalk lines cross your floor as guides. As you install, you will walk around your floor, the wind will blow, tiles may slide around, the ferrets may get loose, and what will happen to those lines of gentle, powdered chalk? They might gradually fade away. Try this. After you snap your chalk lines, go over them with hairspray (Aqua Net is the best for this). Let it dry, and you will have effectively sealed your chalk lines into place.
If you will be spreading glue on your floor, pay attention to the part of the label on your adhesive dealing with "open time". This is not how long the bucket can be uncovered, but how long you will want to wait between spreading the glue and laying down the tile. Go too early, and bubbles could form under your floor. Too late, and it won't stick.
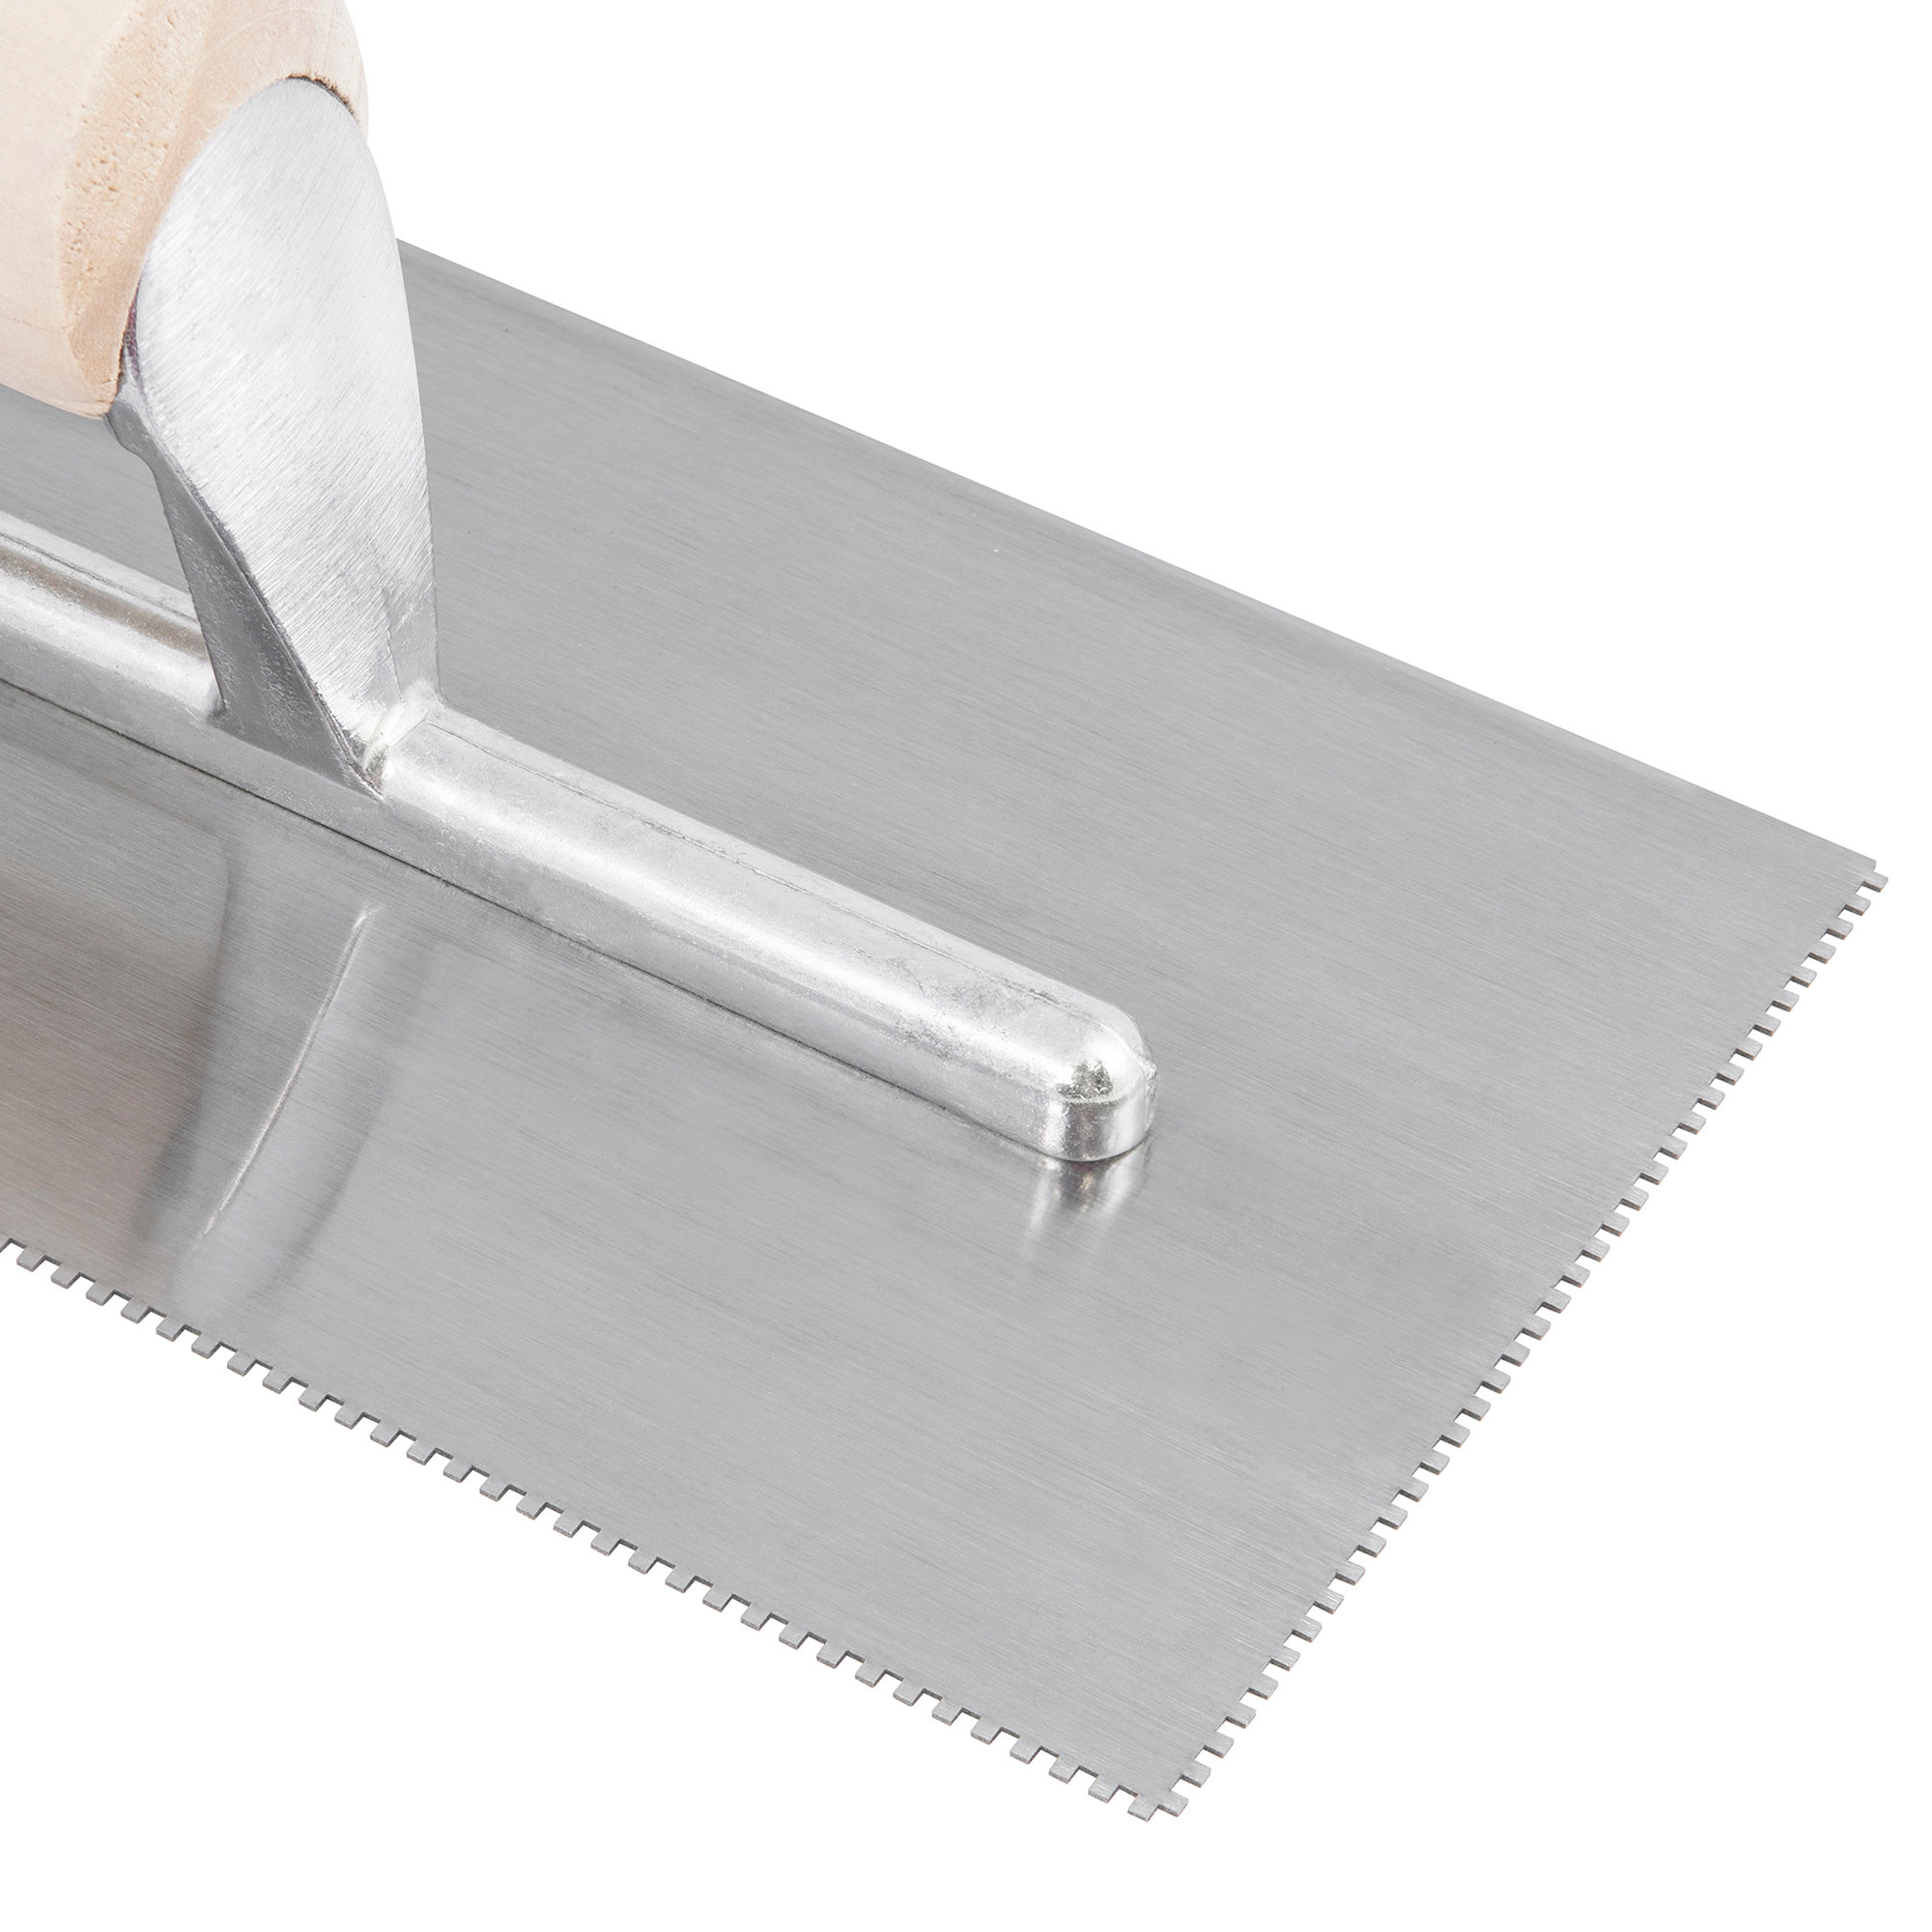
"A trowel. They also come V-notched."
Make sure to use the exact trowel size recommended. The size refers to the notches through which the glue flows as you spread. They control how much glue gets put onto the floor, so don't fudge this one. Also, the best angle to use when spreading glue with a trowel is about 60 degrees to the floor. Definitely not straight up.
For any area you're troweling, first create a perimeter with the adhesive (or meet the physical barrier, wall, door, etc.), and then work your way into the center of the area. Keep it smooth. Glue globs become floor bumps.
Make sure to get your adhesive over the entire floor, especially corners, floor edges and little nooks. Wherever you don't, that's where it will start to peel up.
It's helpful to keep warm water and a sponge right with you, so you can wipe up any misapplied adhesive while it's wet. Once it has dried into place, other chemicals may be needed to get it up.
If you're installing a peel and stick form of vinyl plank or tile, and you lay a piece down incorrectly, don't freak out. All is not lost. Keep a hair dryer around (and plugged in), heat the errant piece of flooring, and when it gives, pull it up and quickly place it down correctly. Crisis completely averted.
With sheet vinyl, there is a lot of smoothing to be done. Some is done with a heavy roller of a little less than 100 pounds, but some can be done "by hand". You'll hear of a kitchen roller being used. Another option, if you don't have access to the kitchen roller or worry about scraping your floor, is to take a small piece of a 2x4 piece of wood, somewhere between a foot to a foot and a half in length, wrap it with carpeting or a towel, and use that to slide over the floor to smooth out bubbles, or adhere it to its glue.
If, after you've rolled as much as you can roll, there are still some bubbles, wait a night. They may disappear on their own. If they don't, pierce the bubbled area with a razor blade (via utility knife, exacto knife - anything but a lady bic), push them flat, and use a seam sealer to re-close the slit.
When trimming sheet vinyl where it meets the wall, it can be helpful to put something heavy on the floor so it does not move while you work. Once done, you'll take this object back out of the room for a while (explained below). Also, you can use a piece of wood to create a crease in the vinyl, and then trim using that crease as your guide.

One of the best tools used to trim your laid vinyl is called the hook blade. It's a special blade for utility knives, very easy to find at home stores.
Installation tips - after the Installation
With sheet vinyl, stay off the floor, especially near the seams, for at least 24 hours.
If your vinyl flooring has been adhered to the subfloor at all, you can gently walk across it a full day after the installation is finished, but it's best to leave your furniture or appliances off for one to three days. Also, have the area well ventilated for 2 to 3 days. Don't mop for 5 days. All of this is to let it really adhere to the subfloor
Living on the floor
Keep an eye on rollers and casters, and keep felt on the feet of your furniture. This will protect the floor from general movement of desk chairs, and any vibrations affecting a couch over the years. If you need to move furniture across your vinyl floor, don't trust the wheels, and don't trust the felt padding. You can use the little professional moving pads sold at home stores, but those are really best for going over carpet. With vinyl, the safest way to slide heavy things around is by laying down thin pieces of plywood, and sliding your furniture across those to get it where you need it to be. Or you can just carry it.
Those are our tips, but you may have experienced something we haven't. Share your wisdom? Let us know what would you add to this list!
– – – –
David has written and made videos about flooring products and installation since 2011 at Floors To Your Home (.com), where he is also the PPC Manager, a Researcher, a Website & Marketing Strategy Team member, Videographer, Social Strategist, Photographer and all around Resource Jito. In my spare time I shoot and edit video, put together a podcast, explore film history, and mix music (as in ‘play with Beatles multi-tracks’). Connect with
W. David Lichty
Follow Team Floors To Your Home on Facebook
